CIDR, which stands for Classless Inter-Domain Routing, is an IP addressing scheme that improves the allocation of IP addresses. It replaces the old system based on classes A, B, and C. This scheme also helped greatly extend the life of IPv4 as well as slow the growth of routing tables.
In this article, we’ll explore how CIDR actually works, as well as provide examples to better demonstrate the concepts explained.
The old method of IP addressing came with inefficiencies that exhausted the availability of IPv4 addresses faster than it needed to. The classful routing system included classes A, B, and C:
Class A – Over 16 million host identifiers
Class B – 65,535 host identifiers
Class C – 254 host identifiers
The problem would commonly occur when an organization required more than 254 host machines and therefore would no longer fall into class C but rather class B. This means that the organization would use a class B license even though they had far less than 65,535 hosts. Therefore if an organization only required 2,500 hosts, they would be wasting about 63,000 hosts by holding a class B license which would greatly decrease the availability of IPv4 addresses unnecessarily.
How Does CIDR Work?
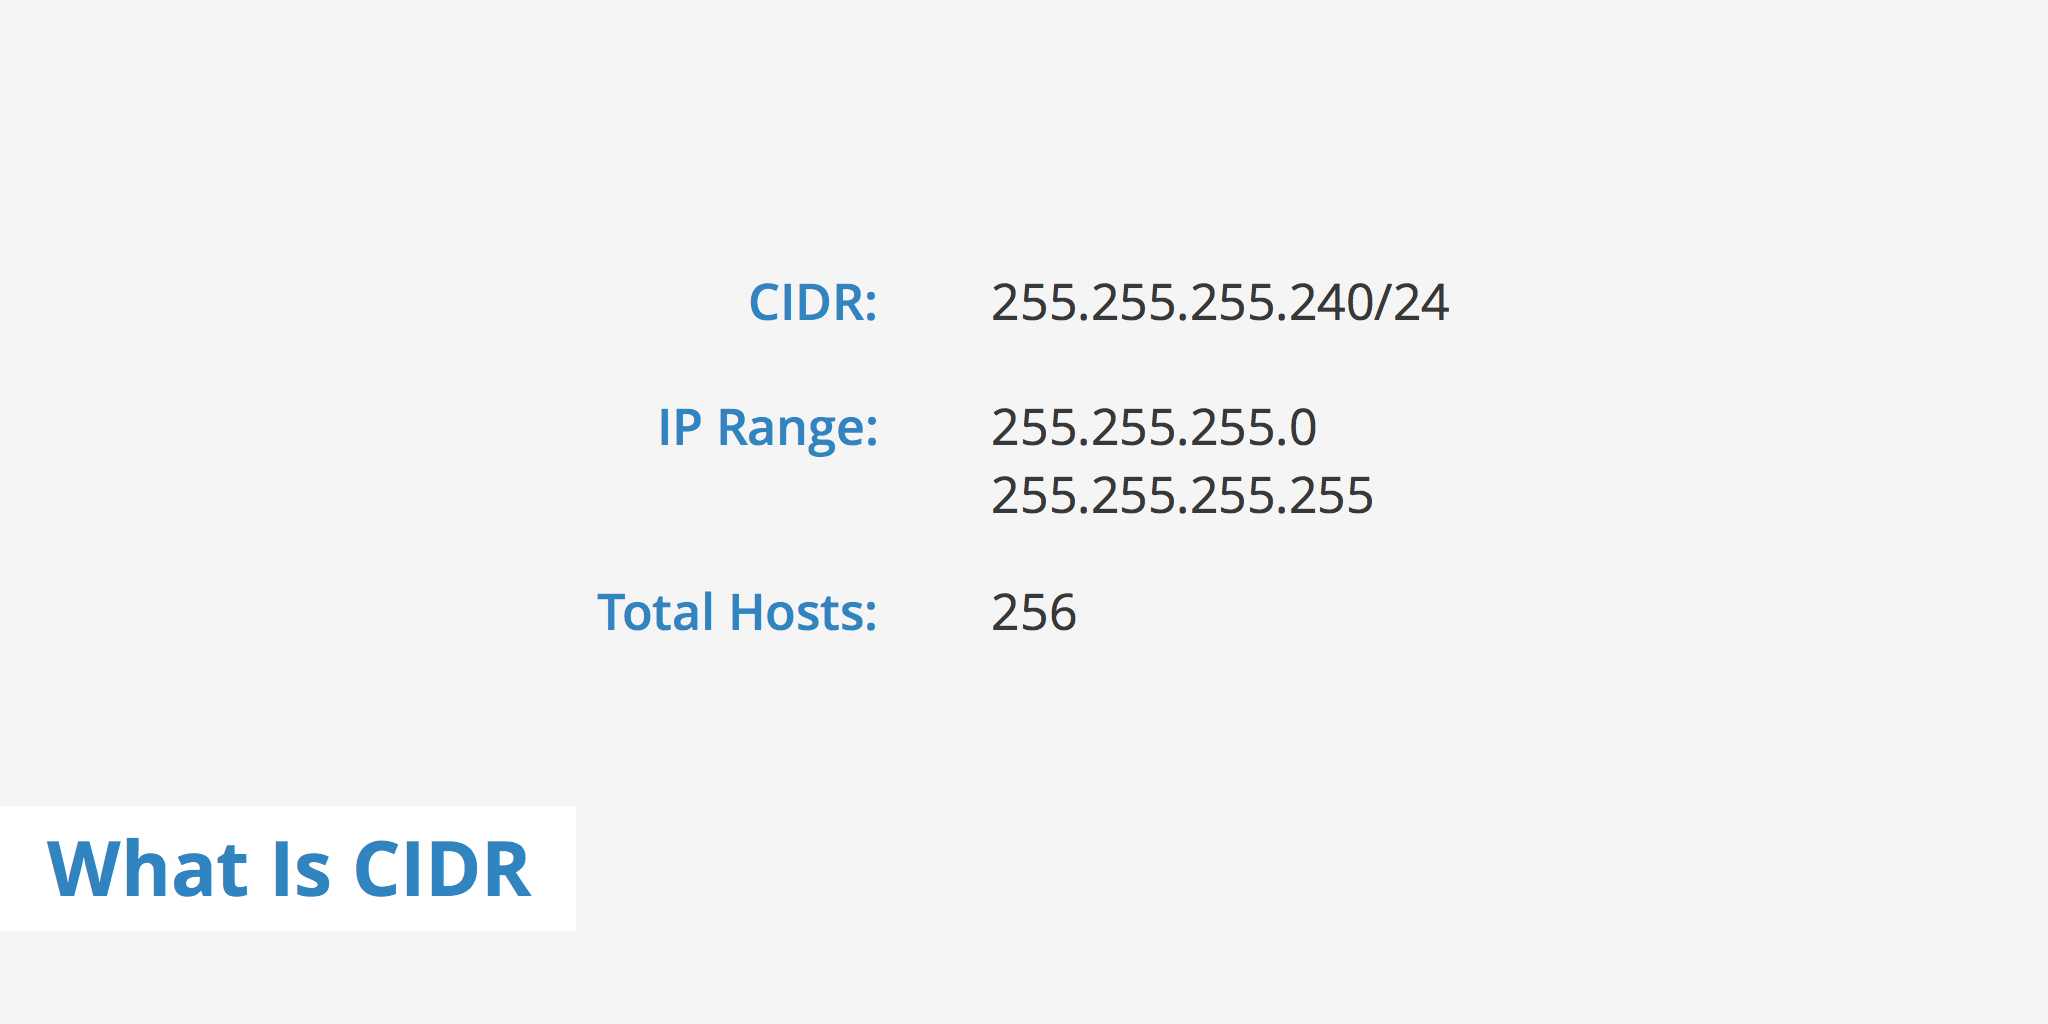
CIDR is based on variable-length subnet masking (VLSM). This allows it to define prefixes of arbitrary lengths making it much more efficient than the old system. CIDR IP addresses are composed of two sets of numbers. The network address is written as a prefix, like you would see a normal IP address (e.g. 192.255.255.255). The second part is the suffix which indicates how many bits are in the entire address (e.g. /12). Putting it together, a CIDR IP address would look like the following:
192.255.255.255/12
The network prefix is also specified as part of the IP address. This varies depending upon the number of bits required. Therefore, taking the example above, we can say that the first 12 bits are the network part of the address while the last 20 bits are for host addresses.
Pip is a package management system that simplifies installation and management of software packages written in Python such as those found in the Python Package Index (PyPI). Pip is not installed by default on Ubuntu 18.04, but the installation is pretty straightforward.
In this tutorial, we will show you how to install Python Pip on Ubuntu 18.04 using the aptpackage manager. We will also walk you through the basics of installing and managing Python packages with pip.
Prerequisites
Before continuing with this tutorial, make sure you are logged in as a user with sudo privileges.
Installing pip for Python 3
Ubuntu 18.04 ships with Python 3, as the default Python installation. Complete the following steps to install pip (pip3) for Python 3:
Start by updating the package list using the following command:
sudo apt update
Use the following command to install pip for Python 3:
sudo apt install python3-pip
The command above will also install all the dependencies required for building Python modules.
Once the installation is complete, verify the installation by checking the pip version:
pip3 --version
The version number may vary, but it will look something like this:
pip 9.0.1 from /usr/lib/python3/dist-packages (python 3.6)
Installing pip for Python 2
Python 2 is not installed by default in Ubuntu 18.04. To install Python 2 and pip for Python 2, complete the following steps:
Update the package index by running the following command:
sudo apt update
Install pip for Python 2 with:
sudo apt install python-pip
The command above will install Python2, Pip and all the dependencies required for building Python modules.
Verify the installation by printing the pip version number:
pip --version
The version number may vary, but it will look something like this:
pip 9.0.1 from /usr/lib/python2.7/dist-packages (python 2.7)
How to Use Pip
When installing python modules globally it is highly recommended to install distribution provided python modules using the apt package manager because they are tested to work properly on Ubuntu systems.
You should install Python modules globally using pip only if there is no package available through the package manager.
In most cases, you should use pip within a virtual environment only. Python Virtual Environments allows you to install Python modules in an isolated location for a specific project, rather than being installed globally. This way you do not have to worry about affecting other Python projects.
In this section, we show you a few useful basic pip commands. With pip, we can install packages from PyPI, version control, local projects, and from distribution files but in most cases, you will install packages from PyPI.
To view the list of all pip commands and options, type:
pip3 --help
You can get more information about a specific command using pip <command> --help. For example to get more information about the install command, type:
pip install --help
Installing Packages with Pip
Let’s say you want to install a package called scrapy which is used for scraping and extracting data from websites.
To install the latest version of the package you need to run the following command:
pip3 install scrapy
To install a specific version of the package you would issue the following command:
pip3 install scrapy==1.5
Replace pip3 with pip if using Python 2.
Installing Packages with Pip using the Requirements Files
requirement.txt is a text file that contains a list of pip packages with their versions which are required to run a specific Python project.
Use the following command to install a list of requirements specified in a file:
pip3 install -r requirements.txt
Listing Installed Packages
To list all the installed pip packages use the command below:
pip3 list
Upgrade a Package With Pip
To upgrade an already installed package to the latest version use the following command:
pip3 install --upgrade package_name
Uninstalling Packages With Pip
To uninstall a package run:
pip3 uninstall package_name
Conclusion
In this tutorial, you have learned how to install pip on your Ubuntu machine and how to manage Python packages using pip. For more information about pip, visit the pip user guide page.
If you have any questions or feedback, feel free to comment below.
Go to Definition. If a language supports it, you can go to the definition of a symbol by pressing F12. If you press Ctrl and hover over a symbol, a preview of the declaration will appear.
Jump to the definition with Ctrl+Click or
Open the definition to the side with Ctrl+Alt+Click.
Hold Ctrl and press Tab to view a list of all files open in an editor group. To open one of these files, use Tab again to pick the file you want to navigate to, then release Ctrl to open it.
Matching brackets will be highlighted as soon as the cursor is near one of them. You can jump to the matching bracket with Ctrl+Shift+\
Use Ctrl+Alt+- and Ctrl+Shift+- to navigate between files and edit locations. If you are jumping around between different lines of the same file, these shortcuts allow you to navigate between those locations easily.